posted on January 10, 2015 00:46
Follow these steps to
configure JRiver Media Center 20 for Mac for use
with exaSound DACs:
1.
Download and install the exaSound OS X driver. You will find detailed instructions in the Owner's Manual.
2. Download and install JRiver Media Center for Mac from the official company’s website
http://www.jriver.com.
3. Start JRiver, from the Menu select Tools -> Options.
4. From the Audio tab select Audio Device -> exaSound (Core Audio)

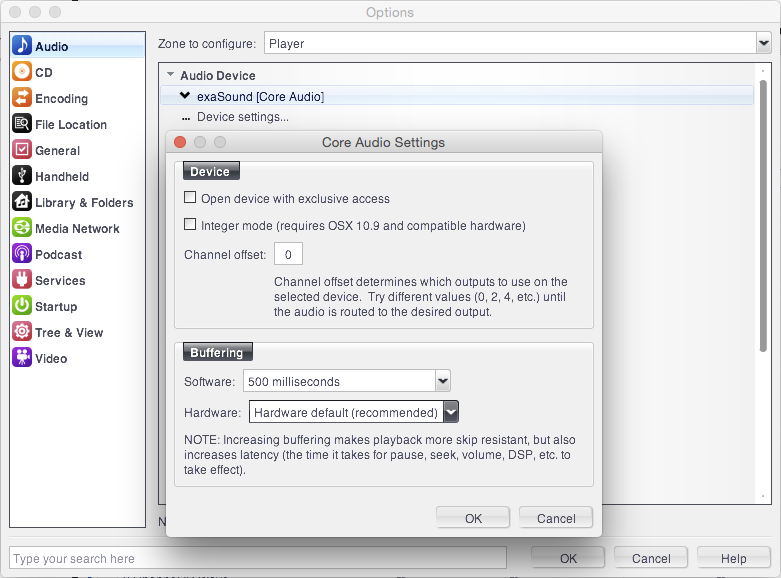
5. Following down the items in the Audio tab click on Device settings and select Buffering -> Software: 500ms.
Optionally you can check Open device with exclusive access and Integer mode.
6. Select DSP & output format. There are many different ways to use DSP Studio. During the initial JRiver setup we suggest turning off all DSP processing. exaSound DACs can handle all PCM and DSD sampling rates and resolutions natively. Turning off DSP processing and configuring DSD bitstreaming are the basic prerequisites for bitperfect operation.
Make sure that
No Change is selected for PCM sampling rates above 96 KHz.
Set the channel configuration to 2.0, 5.1 or 7.1.
Uncheck all check-boxes in the list on the left side of the DSP Studio.
Once basic operation is confirmed you can experiment with the channel configuration and other DSP options.

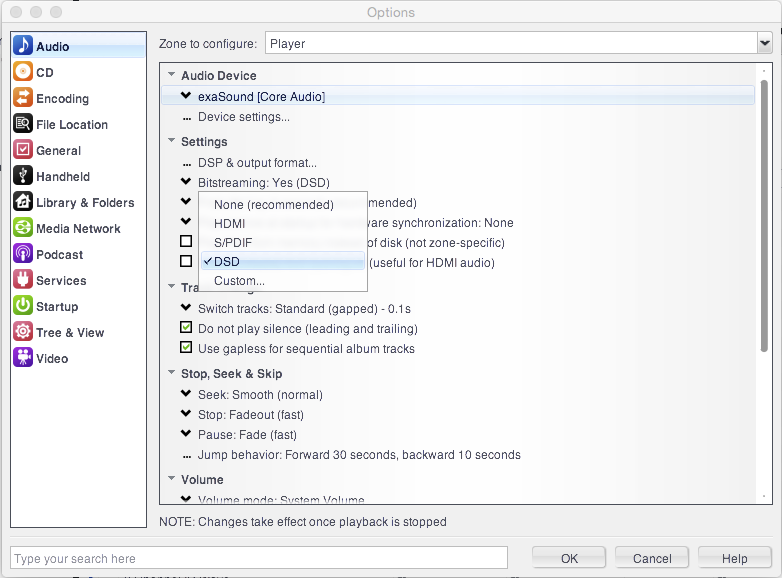
7. Set Bit-streaming to DSD. (DSD over PCM (DoP) 1.0)
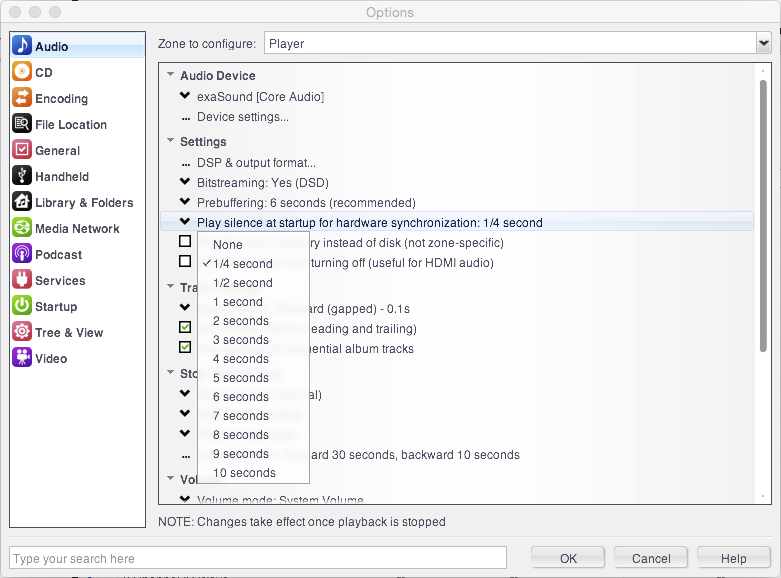
8. Set Play silence at startup for hardware synchronization to 1/4 second.
9. Set Switch tracks to Standard (gapped) - 0.1 sec.
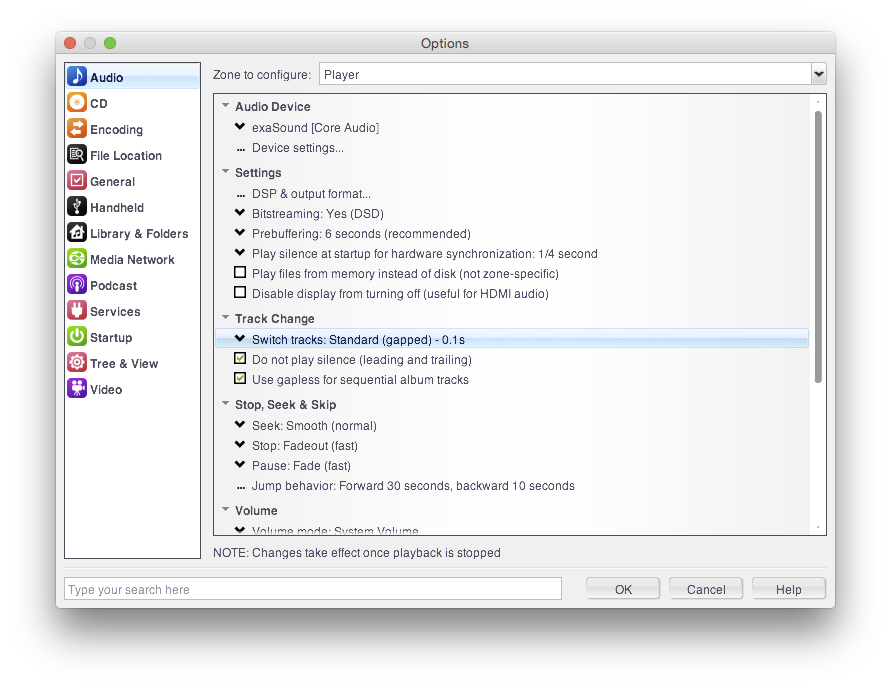
10. Uncheck Do not play silence (leading and trailing).
11. Set Volume mode to System Volume.
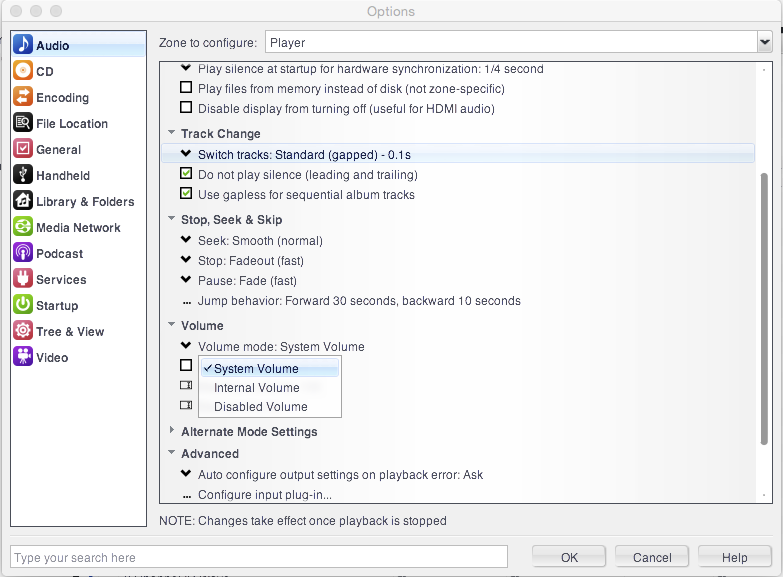
12.Under Advanced set Auto configure output settings on playback error to Ask. The default value of this setting is Yes and this causes confusion. One unexpected side effect of the automatic auto-configure is that JRiver silently enables down-sampling of 352.8kHz and 384kHz PCM formats to 174.6kHz. Automatic auto-configure also forces conversion of DSD128 to PCM 174.6kHz.
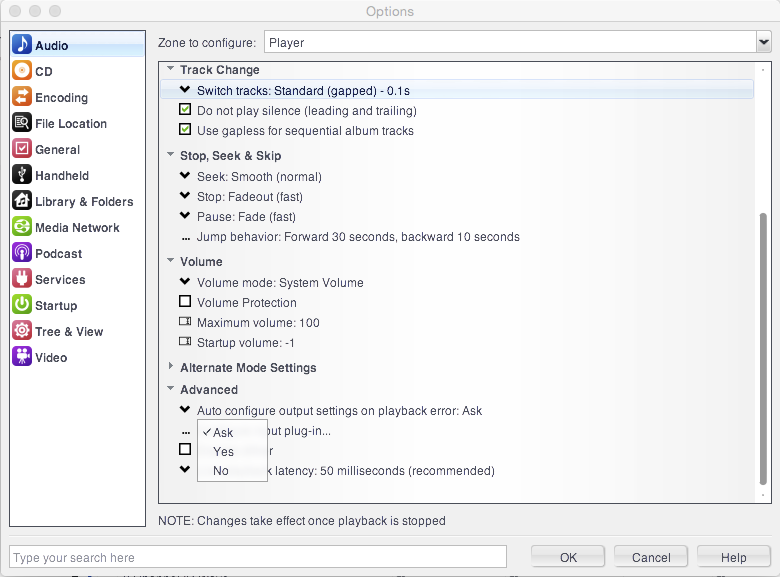
13. Close the Options window and save the settings.
14. Open the Audio MIDI Setup utility and verify the exaSound driver configuration. Here are sample screenshots for the exaSound driver configured for two-channel operation:
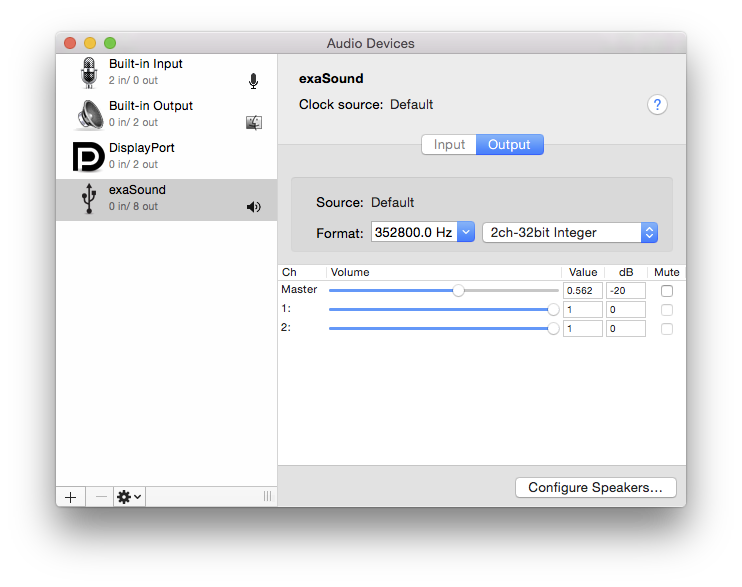
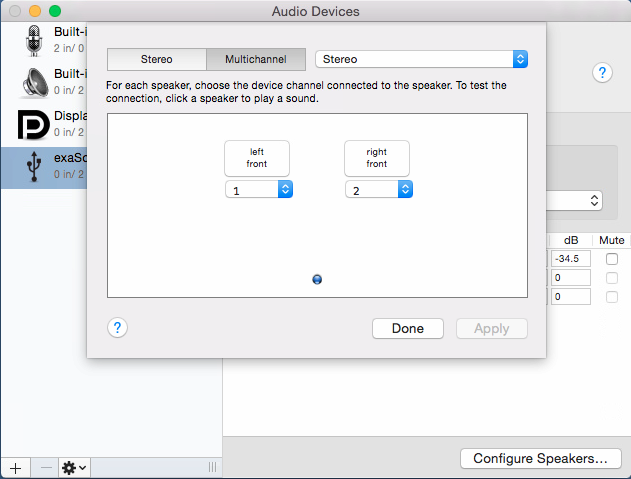
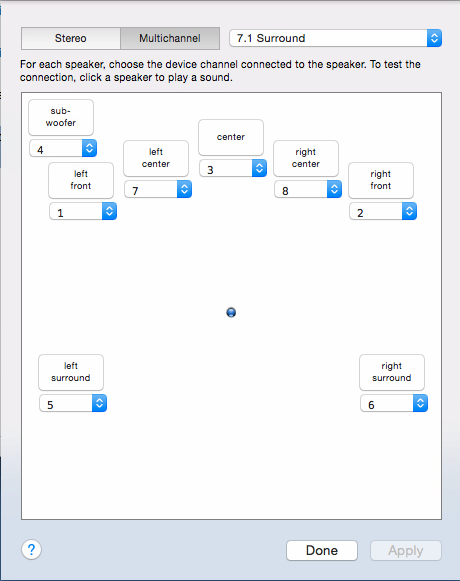
If you are using a multichannel exaSound DAC Select 8ch-32bit Integer and adjust the speakers configuration as needed.

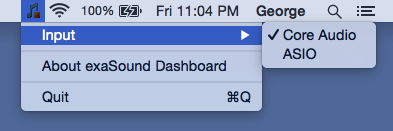
15. Double-check that the exaSound Dashboard output mode is set to Core Audio.
At this point you should be able to play all PCM and DSD files in their native sampling rate, resolution and channel configuration. Enjoy the music with your exaSound DAC.
Known Issues and Limitations
1. At present JRiver 20 for Mac is unable to play in bit-streaming mode DSD256 files. If you attempt to play DSD256 file with the settings recommended in this guide, you will get the following error message:
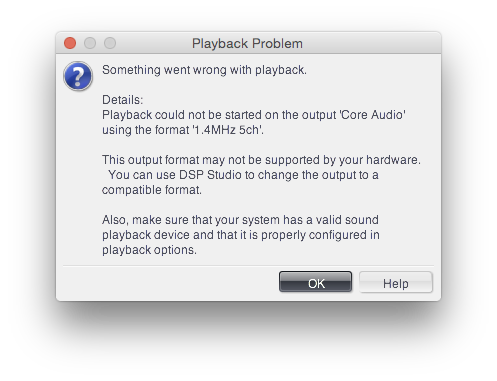
The JRiver development team is aware of this limitation.
2. Some customers reported that multichannel DSD files cause JRiver 20 for Mac to crash in bit-streaming mode. This is an intermittent behavior that is hard to trace. If you experience this issue please provide crash reports to http://yabb.jriver.com/interact/index.php?board=39.0
3. JRiver is working on implementing support for the exaSound ASIO drivers for OS X. ASIO offers shorter sound-streaming path, guaranteed Exclusive 32bit Integer mode operation and support for native DSD. ASIO also offers more efficient processing that is essential for multichannel DSD256 bitstreaming.