posted on July 04, 2016 12:50
This step-by-step guide illustrates how to configure the Roon server running on the exaSound PlayPoint for use with the Roon Remote app.
RoonReady brings the PlayPoint experience to the highest level by providing enhanced network discovery, support for high-resolution audio formats and seamless volume control synchronization.
To control the Roon Server on the PlayPoint, you need to have the Roon Remote app installed and running on your iPad, iPhone or Android device. For more information on subscribing to Roon and installing the Roon Remote app please visit roonlabs.com.
If you haven't done so, follow the instructions from the PlayPoint Owner's Manual for initial setup of your PlayPoint.
Connect the exaSound PlayPoint to the home network. Make sure that your mobile device and the PlayPoint are connected to the same network segment.
Power on the PlayPoint and wait for the Home screen to appear.
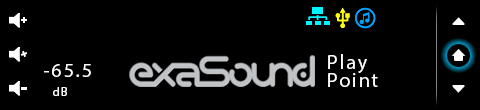
The three color icons on the top indicate that the PlayPoint has a network connection, an exaSound DAC is connected to the PlayPoint and the playback engine is running. You need to see the three icons before continuing to the next step.
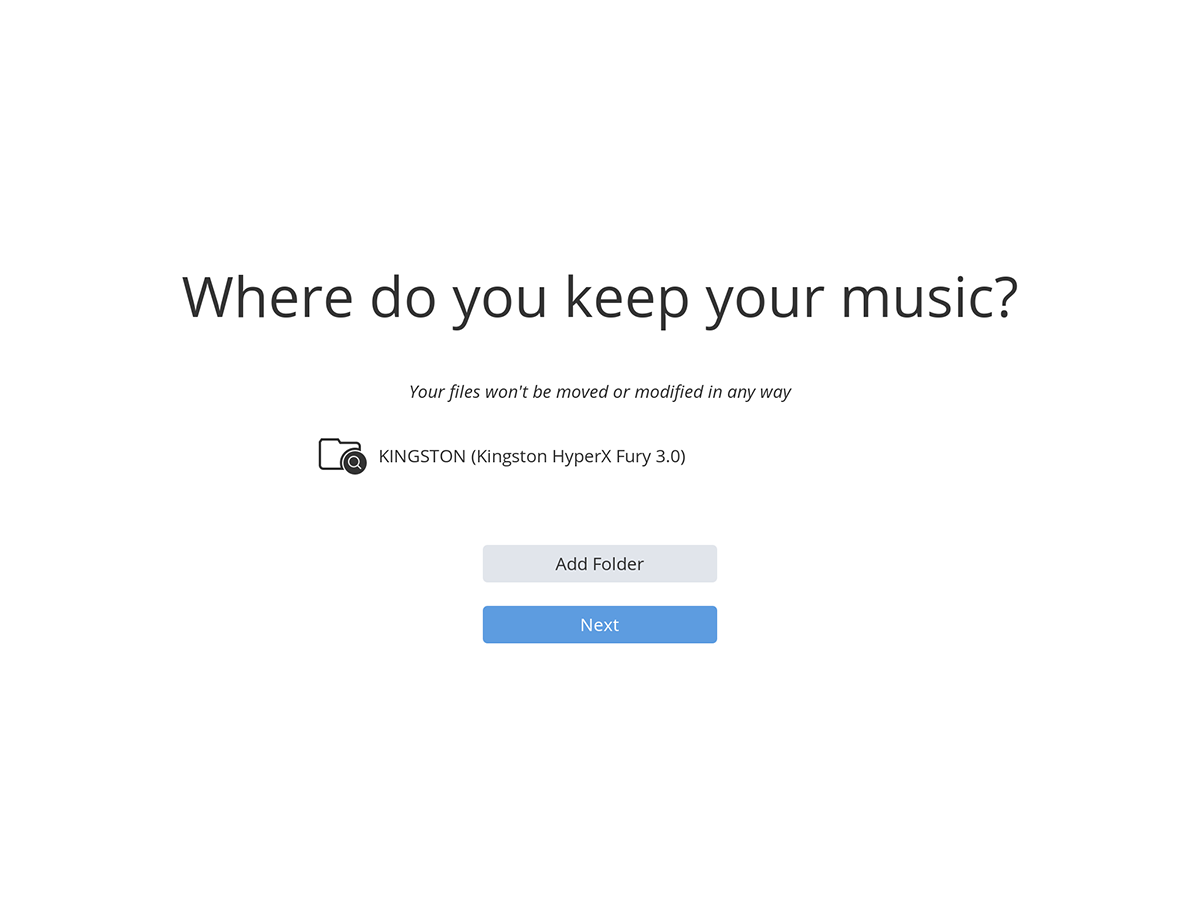
If you store your music files on a USB drive, attach it to the PlayPoint.
If you use a Network Attached Storage (NAS) drive, make sure it is connected to your home network.
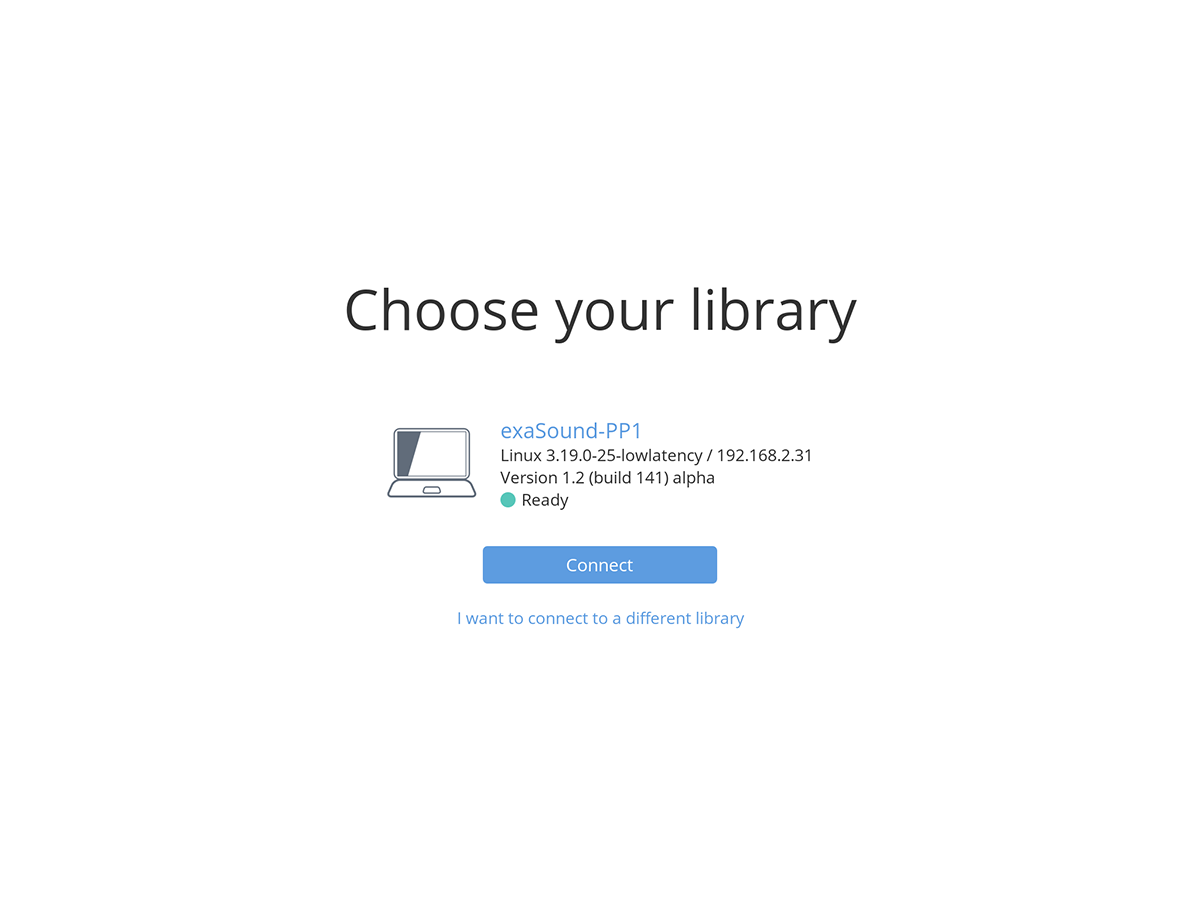
Start the Roon Remote app on your tablet or phone. Connect to the Roon Server on the PlayPoint.
(You can click on the screenshots bellow to see them enlarged.)
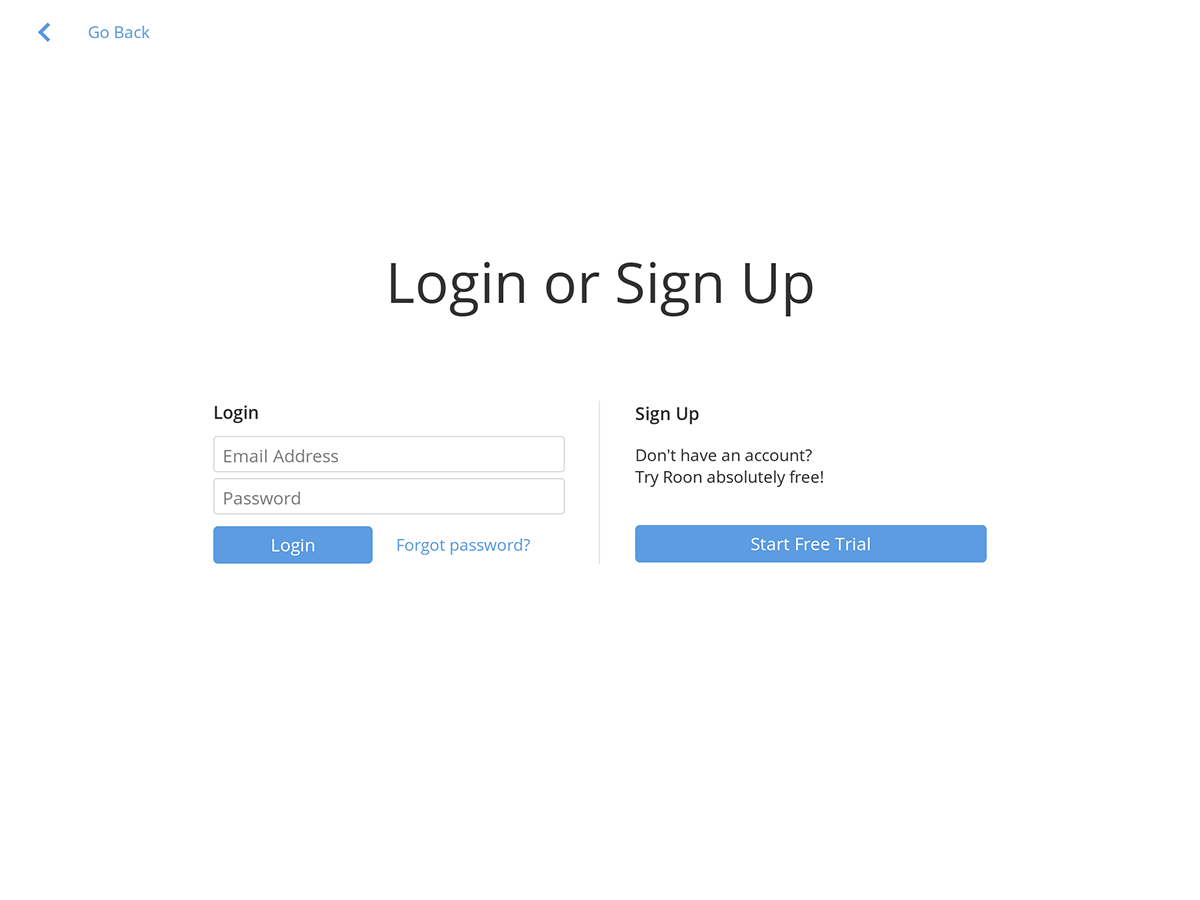
Login to the Roon cloud service.
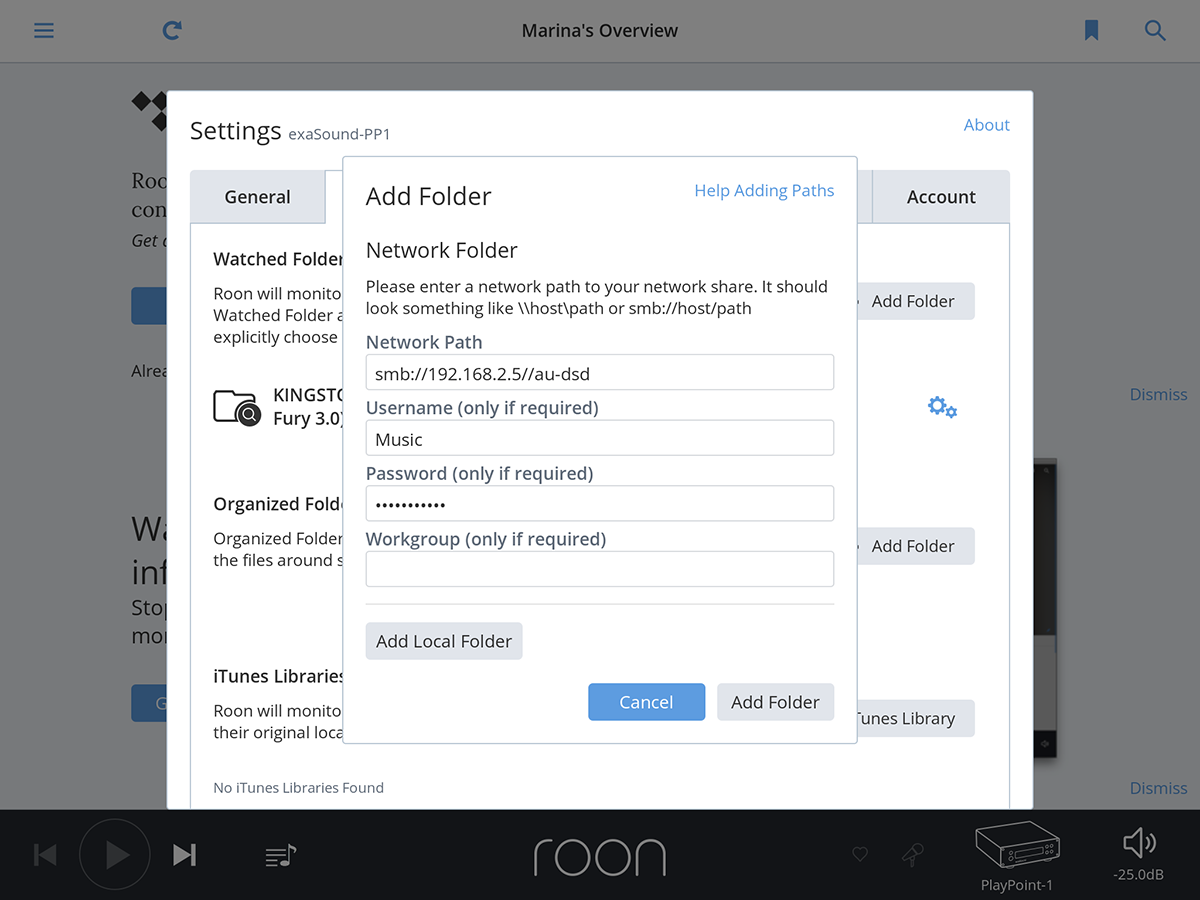
If you have a USB drive with music files attached to the PlayPoint, Roon is going to configure it automatically. If you don't see it or if you need to configure additional music storage locations tap Add Folder.
Add the network path for any network shares with music files located on NAS drives or computers.
Alternatively tap Add Local Folder to configure locally attached USB drives. Local drives are named
/media/usb1 to /media/usb8. /media/usb1 is recognized automatically by Roon.

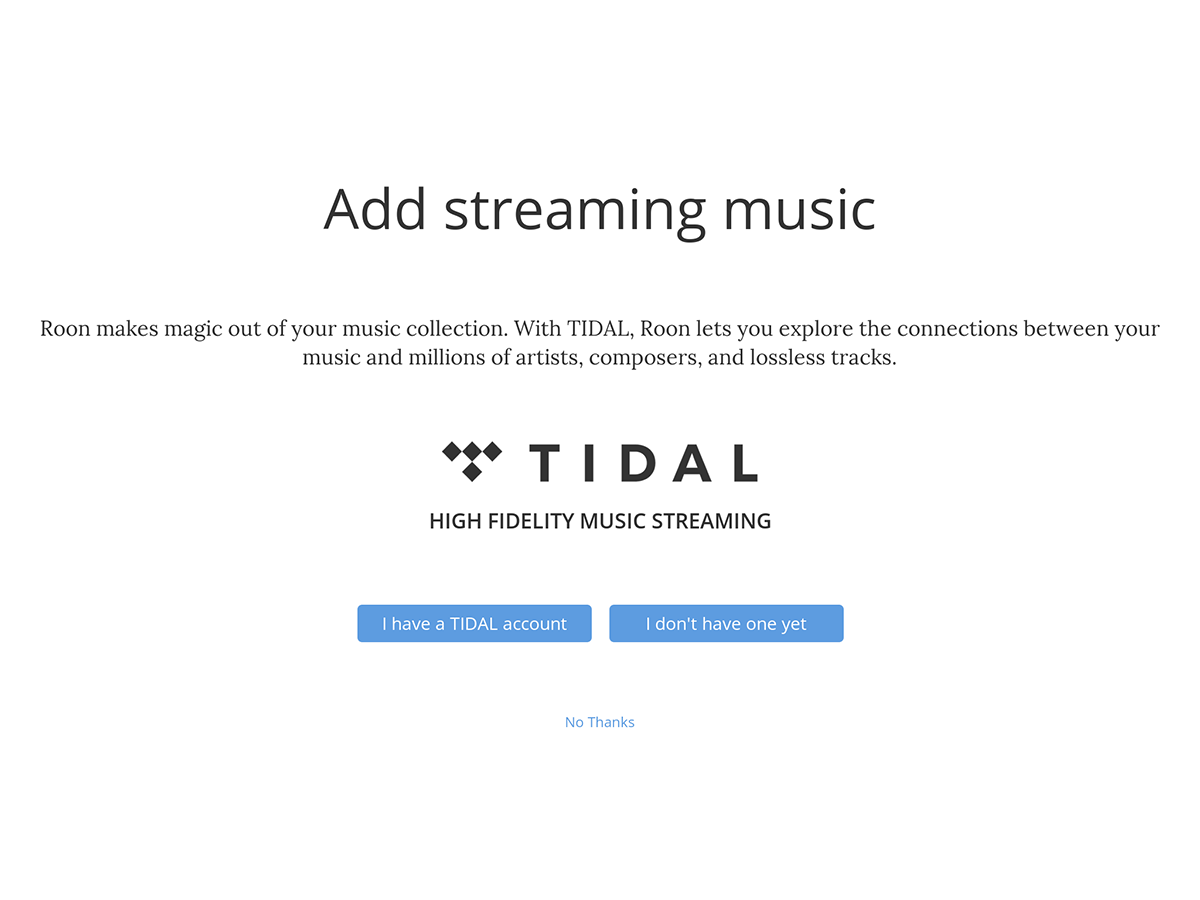
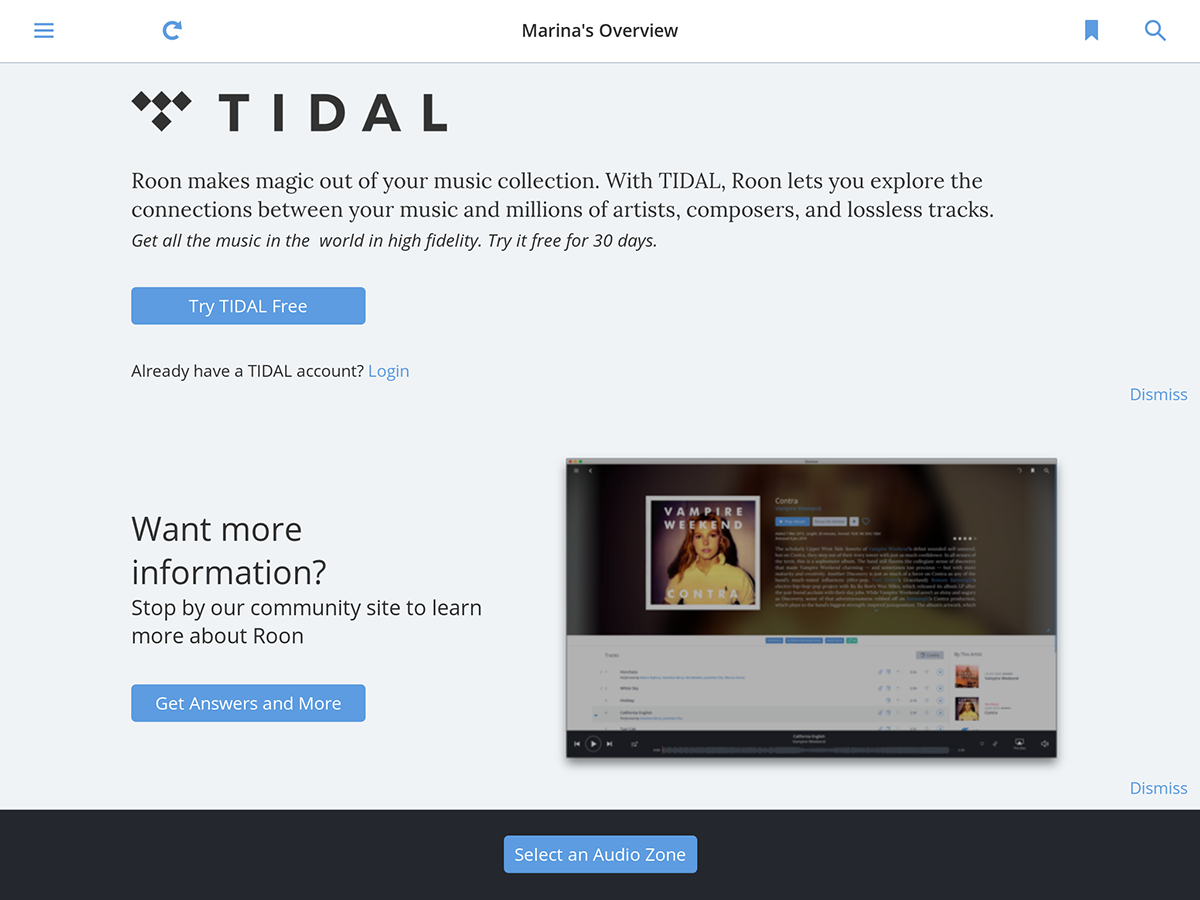
At this point you have the option to configure a Tidal account. This can be done later. Tap No Thanks.
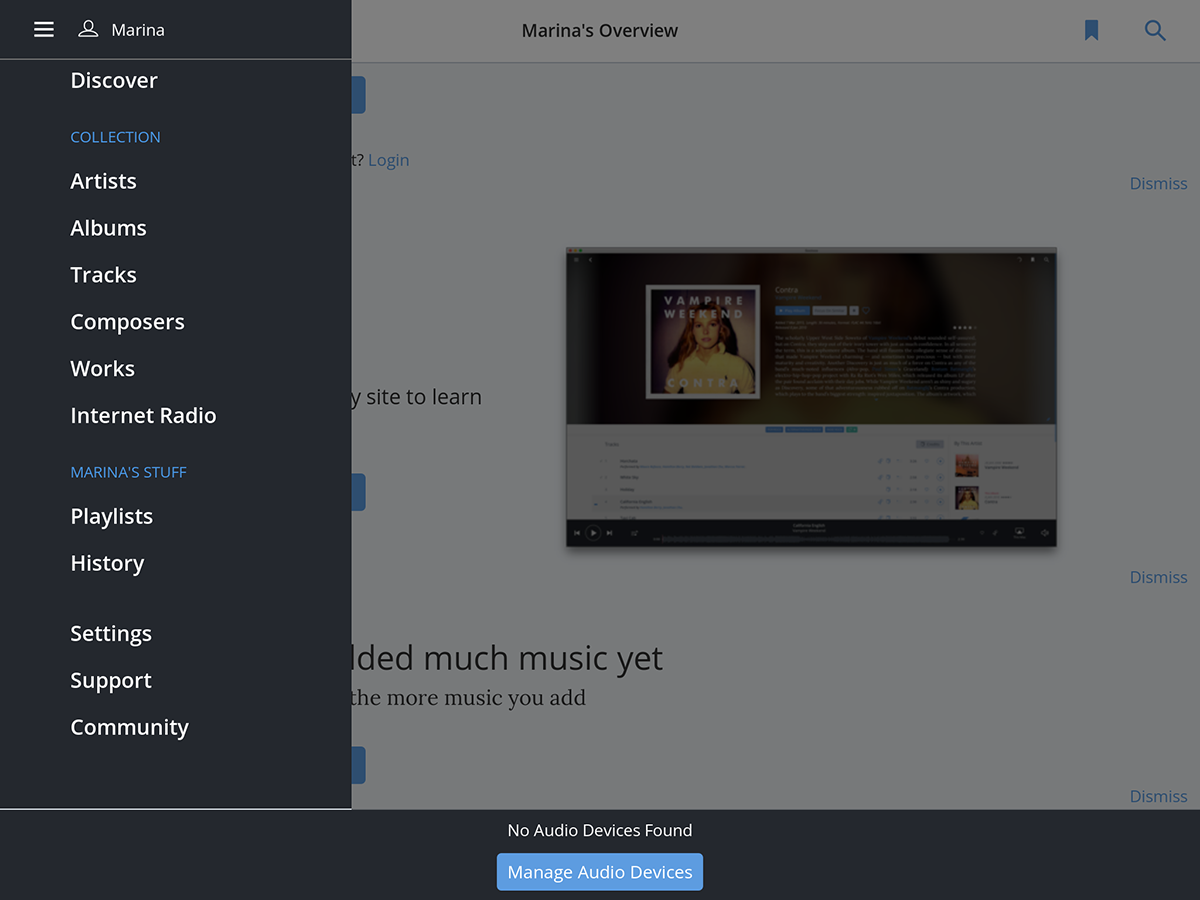
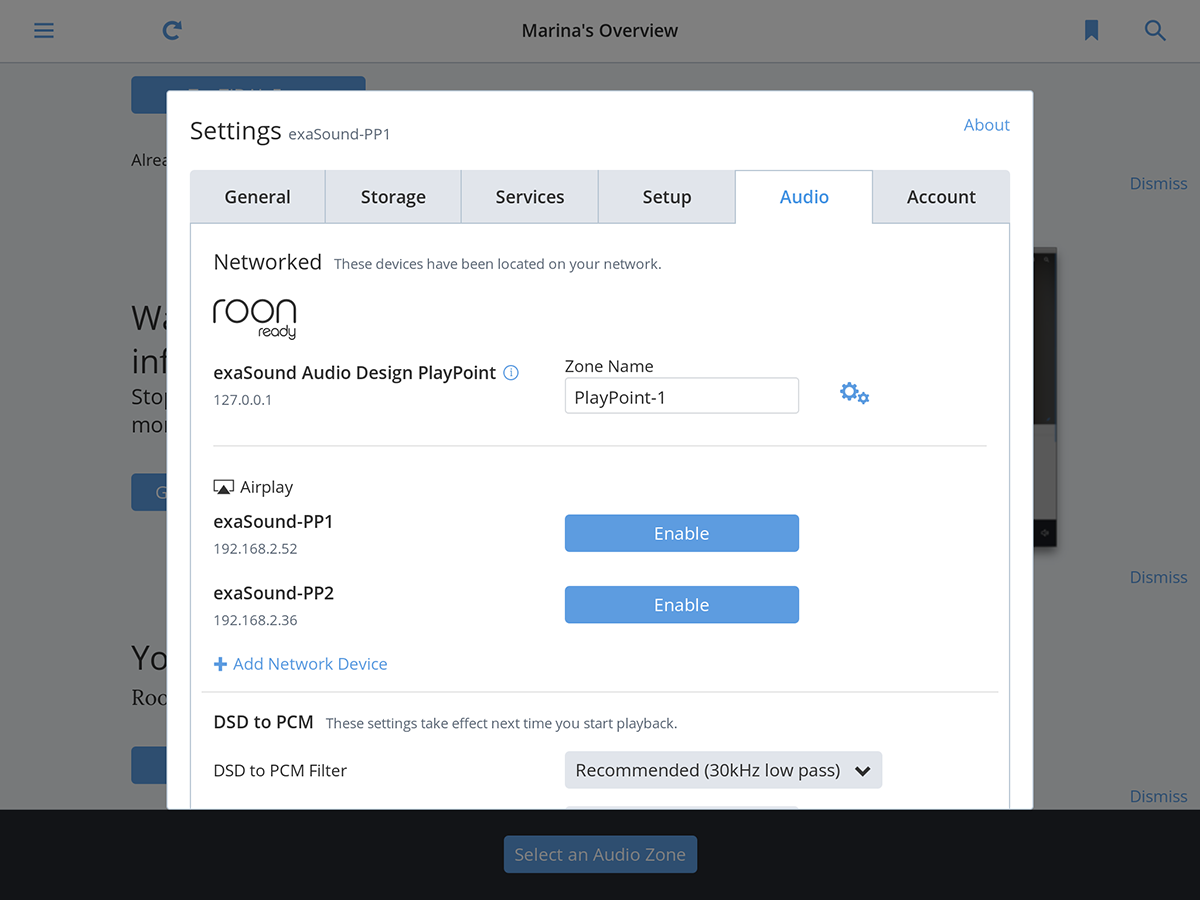
You will see the Roon Main screen. Tap on Manage Audio Devices.
Scroll down to the
Networked section and under
Roon Ready. Enable
exaSound Audio Design PlayPoint 127.0.0.1. Make sure that you are not enabling by mistake the
Airplay entry for the PlayPoint.

Enter a name for the PlayPoint zone. When finished tap outside the Settings window to close it.
From the Roon main window tap on Select an Audio Zone.
Tap on the check mark in front of the PlayPoint zone.
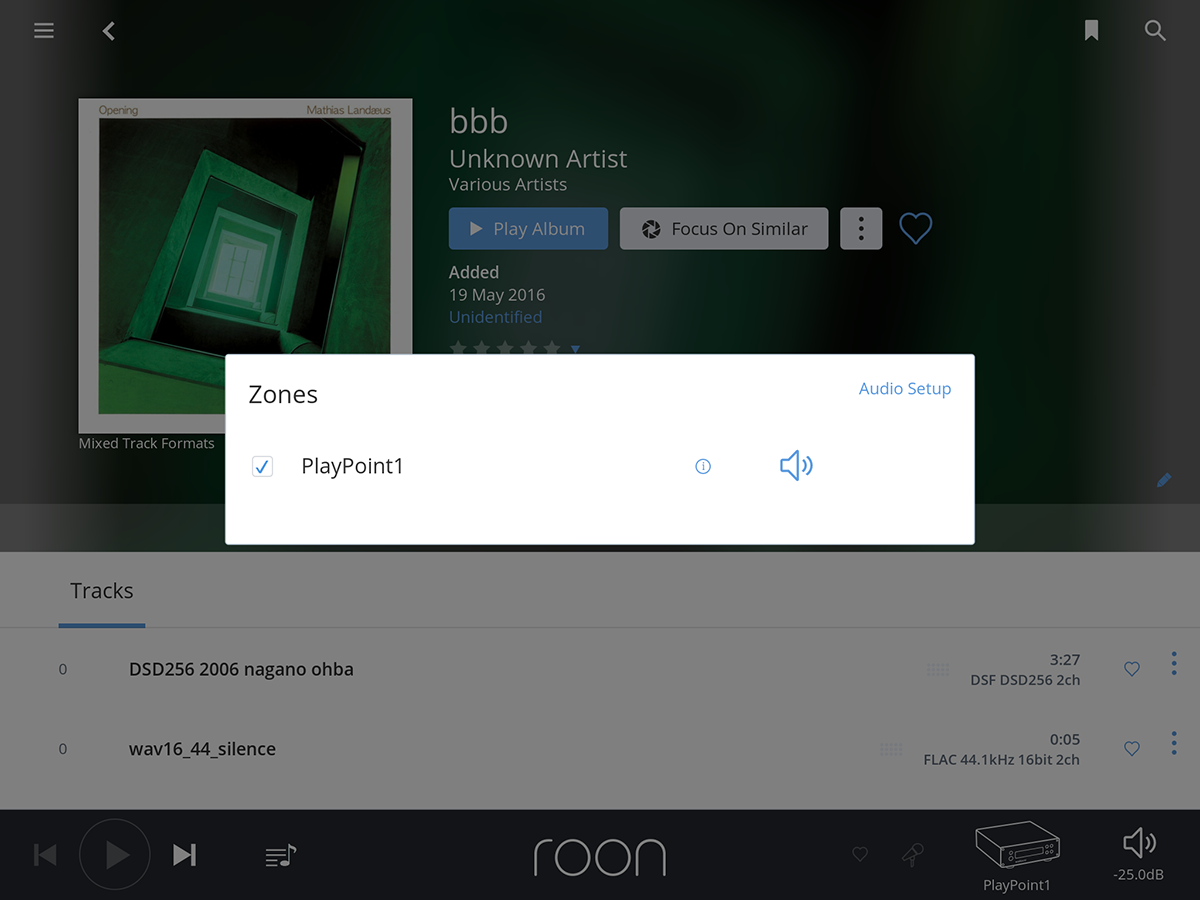
Then tap on the speaker icon and make sure that the volume level is safe.
Tap twice outside the popup windows to close them. You will see the Roon main window.
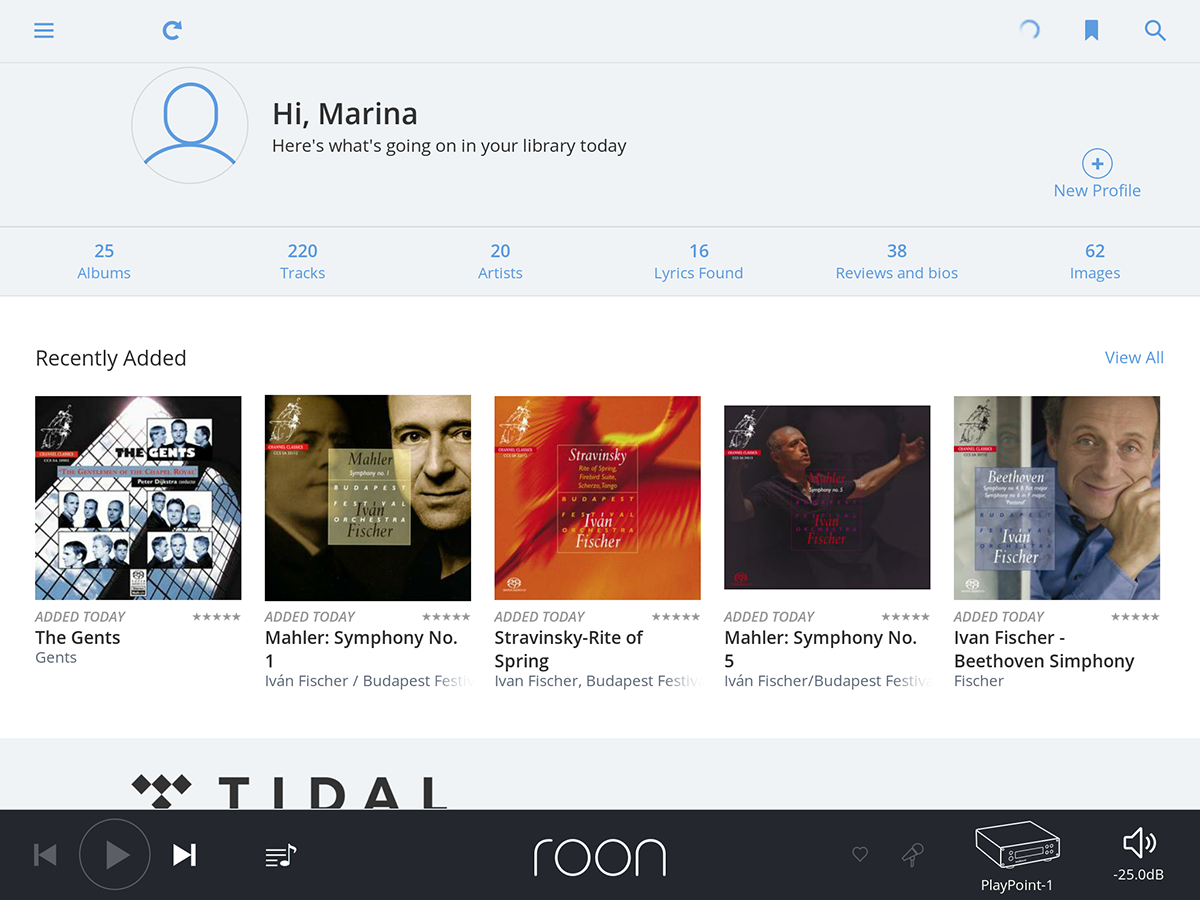
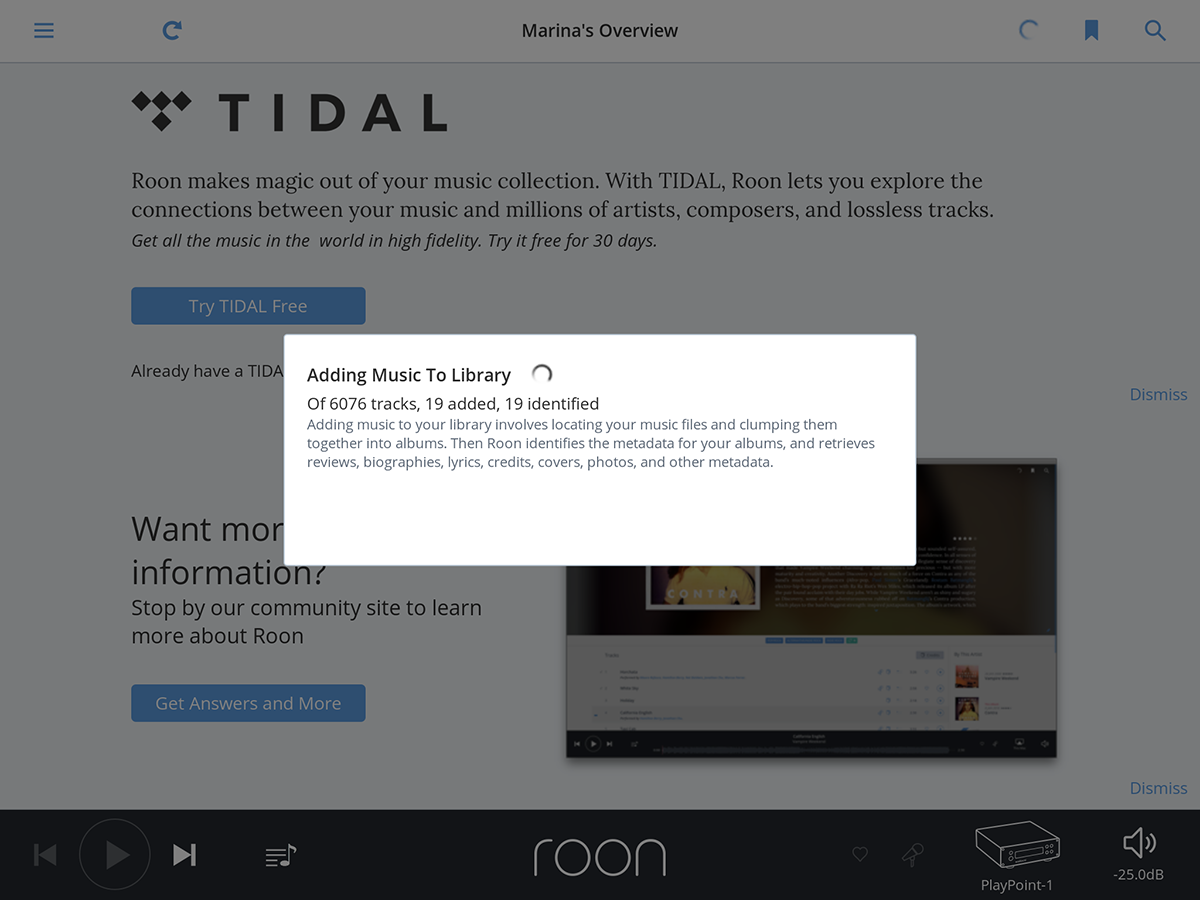
The rotating icon in the upper right corner of the screen indicates that library import is in progress. Tap on it to display the Adding Music to Library window.
The PlayPoint is now configured for use with Roon. You are ready to enjoy the exceptional sonic fidelity of your exaSound devices with the most engaging, enjoyable way to browse your music - Roon!
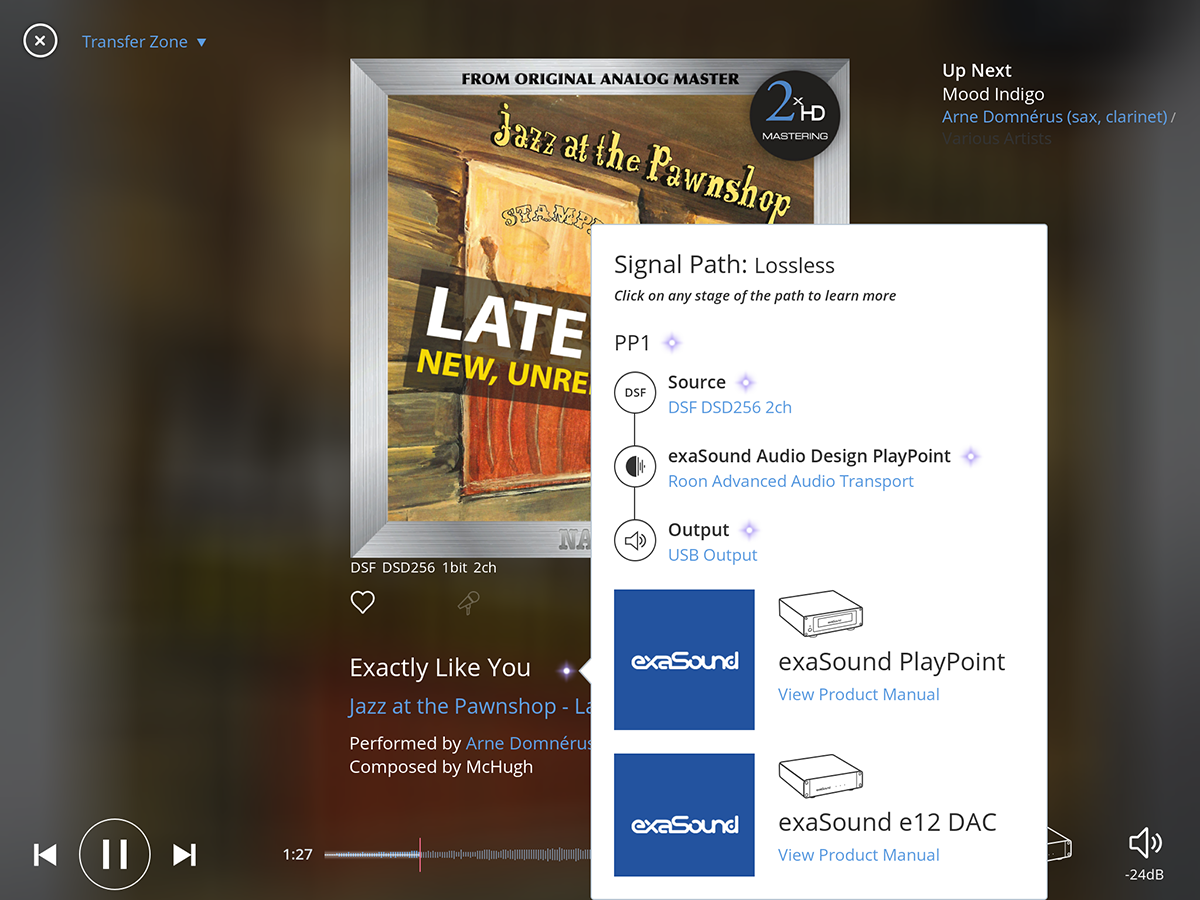
Click or tap on the bright purple dot over the right end of the playback progress bar. You will see the Signal Path popup. The purple star icons and the exaSound logo indicate lossless reference-class audio streaming.